Recipe: Chicken Salad

26 May

Let’s face it. When it’s 90 degrees outside, it’s darn difficult to get motivated to slave over a stove. I mean, really, that’s just about the worst thing I can think of. (Now, if you’ve got awesome air conditioning and your kitchen feels like winter, you might feel differently.) For those of us who cringe at the thought of sweating over a hot stove after sweating at the park with the kiddos all afternoon, this recipe is a lifesaver.
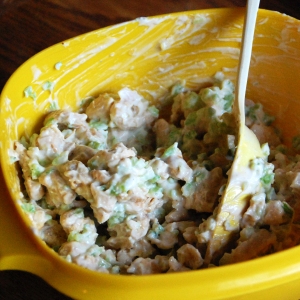
Chicken Salad

Ingredients:

  • 4 cups cubed chicken (cooked)
  • 1 cup celery, cut fine
  • 1 tbsp onion, minced
  • 1 cup plus 2 tbsp mayonnaise
  • 1 tsp lemon juice
  • ¼ tsp seasoned salt
  • ¼ tsp salt

Directions:

  1. Bake chicken 1 ½ hours at 300 degrees. Season with salt, pepper, and seasoned salt.
  2. Mix remaining ingredients.
  3. Serve on croissants.

Do you have a favorite “keep cool” summer dinner recipe? Share it in the comments!

Download the .pdf of this recipe: Chicken Salad Sandwiches

Recipe: Grilled Hawaiian Burgers with Onion and Pineapple

24 May

We. Love. Hamburgers. (Want proof? This blog is only three months old and this is our third burger recipe. See the other two here: Naked Turkey Burgers, Blue Cheese Burgers.)

We like em naked, we like em clothed, and yes my purist friends, we even like them with ketchup. (Some would say that last statement is blasphemy, and to them I say, “get over it”.)

Because of our love for all things burgers and grilling, we’re constantly on the lookout for more ways to indulge in this seemingly all-American food choice. And hey, if we can do it semi-healthfully, we will! Here’s a recipe that never fails to satisfy AND encourage a healthy lifestyle.

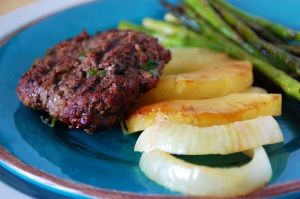
Grilled Hawaiian Burgers with Onion and Pineapple

Recipe borrowed from www.weightwatchers.com

Ingredients:

  • 1 pound ground beef
  • ¼ cup scallions, sliced
  • 3 tbsp teriyaki sauce
  • 1 tbsp ginger root, freshly grated
  • 2 tsp minced garlic
  • 4 slices of pineapple
  • ½ medium vidalia onion, cut into rings
  • cooking spray
  • ¼ cup cilantro, chopped

Directions:

  1. Prepare the grill.
  2. In a medium bowl, combine beef, scallions, teriyaki sauce, ginger, and garlic until thoroughly mixed. Form four equal sized patties.
  3. Lightly coat burgers, pineapple, and onion with cooking spray, place on grill.
  4. Grill every thing until done. Pineapple and onion should have golden edges, burgers to your liking.
  5. Serve burger naked with pineapple and onions.

Do you have a favorite burger recipe? Share it in the comments!

Download the .pdf version of this recipe: Grilled Hawaiian Burgers With Onion & Pineapple

Recipe: Homemade Instant Pancake Mix & Blueberry Syrup

23 May

I don’t know about you, but I grew up knowing one kind of pancake mix: Bisquik. It was the perfect addition to any kitchen- it was easy, flavorful, and required little to no prep. In fact, these qualities still hold true today. Another aspect of Bisquik I’ve learned since becoming the “chef” for our household: that stuff goes fast. It doesn’t seem to matter what size of a box I buy, I’ve rarely got enough. (This could just be me, but seriously, I feel like I say “I’m out of Bisquik” an awful lot.)

So what to do when your box of Bisquik is almost out, but the family wants pancakes? Make your own Bisquik mix with just a few simple ingredients.

Homemade Instant Pancake Mix

Recipe borrowed from The Food Network.

Ingredients (for mix):

  • 4 cups all-purpose flour
  • 3 tablespoons baking powder
  • 2 teaspoons baking soda
  • 1 teaspoon salt
  • 2 tablespoons plus 2 teaspoons sugar

Ingredients (for batter):

  • 1 egg
  • 1 cup milk
  • 1 tablespoon melted butter

Directions (for mix):

  1. Mix together ingredients, put into a jar/tupperware container.

Directions (for batter):

  1. For each 1 cup pancake mix, add 1 egg, 1 cup milk, and 1 tablespoon melted butter. Do not overmix.
  2. Heat a flat griddle or pan over medium-high heat.
  3. Spoon batter onto the hot griddle and when bubbles appear on the surface of the pancakes, flip them over to make them golden brown on both sides.

Now, of course you could top those delicious homemade pancakes with simple butter and maple syrup. The family would be happy, and heck, it’s easy, right? But… if you’re feeling creative, (or maybe you’re just in need of a “Wow, honey, these are amazing” compliment), you could make some blueberry syrup. And don’t worry- it’s only a teensy bit more labor intensive than regular syrup.

Blueberry Syrup

Recipe borrowed from The Food Network

Ingredients:

  • 1 cup maple syrup
  • 1 ½ cups blueberries

Directions:

  1. Combine ingredients in a saucepan.
  2. Bring to a boil.
  3. Remove from heat, put in a pouring container for use on pancakes.

Do you have a favorite homemade version of a classic breakfast? Share it in the comments!

Download the .pdf version of these recipes:

Pancake Batter

Blueberry Syrup

Special Post: We’re Moving!

22 May

I interrupt your regularly scheduled programming to make an important announcement about your favorite blog:

The Frugal Flambe is moving!

After almost three months of daily recipes, tips/tricks, fun facts about our family, and encouragement for those looking to cook more at home, I officially have purchased the rights to www.thefrugalflambe.com, making it possible for us to leave WordPress and host ourselves.

Why would we want do leave WordPress?

Well, many reasons. Firstoff, let me say that WordPress has been beyond wonderful to us, and it’d actually be easier to stick around because of all their awesome perks and plugins. That being said, though, there are some benefits to hosting ourselves:

  1. We can customize the site. We can change the look, the feel, the groove. All of it. It’s all open to us now.
  2. We can now host advertisers. Does this mean we’re going to be one big commercial? Heavens no. But, now we can help connect you to quality retailers and sites that will do more to help you become the culinary master you’ve always wanted to be.
  3. It’s easier to remember. If you love The Frugal Flambe, then you know our name. And now, you know our website too!

What about my subscription?

RSS subscriptions and email subscriptions should be fine. However, this is new to us, so we might have a few glitches. If you’re having trouble, re-subscribe at the new site and all will be well. If you don’t have trouble, then yay! The stars have aligned!

What’s changing, other than the web address?

The look is new, brighter, and hopefully more fun. But the content is the same- a recipe and a bit of encouragement every day for you and yours. (Just a bit more fashionable.)

When will the switch happen?

We’re hoping we can get all the kinks ironed out in the next day or so. If all goes well, you’ll see our new, prettier face VERY soon.

Do you have other questions? Ask them in the comments- we’re here to help!

Dessert Recipe: Strawberry Smoothies

22 May

Summertime is here, and I’m pregnant.

I’m not just a little pregnant. I’m a lot pregnant. Some of you might not know what this means- how can you be “a lot” pregnant? Well, my dear friend, I’ll tell you.

“A lot pregnant”, in my professional opinion, is somewhere between “barely pregnant” and “so pregnant I could scream”.

I’m officially 27 weeks into this pregnancy, which leaves me just 12-13 short weeks til little Abby makes her appearance. I use the term “little” very loosely here, as I happen to be one of those lucky women who produces large, chunky children. (In fact, when Aaron was born, the first words out of the doctor’s mouth as he held my brand new, 9 pound 3 ounce son were, “He’s a chunk!” Oh, what a memory. Thanks, doc.) So anyway, Abby weighs somewhere between 2 and 3 pounds at the moment, and I think I can safely say she’s going to kick-boxer. She’s active, and she loves to play games with the nerves in my back. Oh joy! Also, in case you’re wondering, I’m measuring in at about 30 weeks, (the distance from the top of my belly to the bottom of it), so you can imagine the increasing level of my general discomfort. And don’t even get me started on the effect summer heat has on women who are “a lot pregnant”.

So why am I spending so many precious words to express my complaining-ness to you? Because I’ve found the solution. I’ll give you a hint: it’s pink, it’s served out of a wine glass (because I’m classy like that), and it tastes like heaven. No, there’s no alcohol involved, but it is intoxicating nonetheless.

Strawberry Smoothies

Ingredients:

  • 1 cup frozen strawberries
  • 1/2 cup ice
  • 1/2 cup milk
  • 1 container of strawberry yogurt (the individual sized containers)

Directions:

  1. Put all ingredients into the blender (I used my food processor)
  2. Blend until smooth-ish.
  3. Pour into a nice glass (because it tastes better that way)
  4. Sip your troubles away.

Do you have a favorite summertime dessert? Share it in the comments!

Recipe: Italian Beef Sandwiches

21 May

Sometimes, You just want a sandwich. It’s simplicity is enticing, to be sure. But that doesn’t mean you have to eat a plain old cold cut. In fact, I’d prefer we didn’t eat cold cuts anymore. (My husband and I spent a long time eating predominantly ham sandwiches on wonder bread- it’s a time I don’t ever want to revisit.)

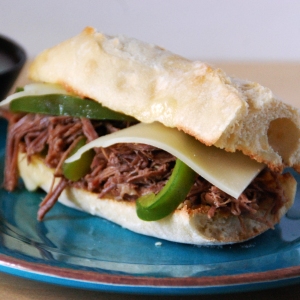
Nay, allow the culinary genius in you to thrive- without working too hard. This Italian beef sandwich is hot, juicy, and the perfect combination of flavors: peppery meat, sweet crunchy peppers, smooth swiss cheese, and lightly toasted french bread to soak it all up.

And the best part? It cooks in the crock pot!

Italian Beef Sandwiches

Ingredients:

  • 2 lbs beef brisket
  • 1 tbsp olive oil-packed1 can beef broth
  • 2 cloves minced garlic
  • 1 tsp dried oregano leaves
  • 1 tsp dried basil leaves
  • ½ tsp salt
  • ¼ tsp pepper
  • ¼ tsp red pepper
  • 2 green bell peppers
  • 1 roll french bread

Directions:

  1. Trim fat from meat, brown in a frying pan with oil.
  2. While meat browns, put all ingredients (except bread and bell peppers) into the crock pot.
  3. Add the meat.
  4. Cook for 6-8 hours.
  5. 15 minutes before you sit down to eat, remove seeds and cores from peppers, slice thinly. Add to the crock pot.
  6. Set the oven to broil on high.
  7. Slice french bread into desired sandwich size pieces, top each half (on the bread side) with swiss cheese, arrange on a cookie sheet.
  8. Toast bread in the oven for 5-8 minutes, or until bread is golden and cheese is melted.
  9. Assemble sandwiches, eat.

Do you have a favorite hot sandwich recipe? Share it in the comments!

Download the .pdf of this recipe: Italian Beef Sandwiches

Recipe: Baked Lemon Artichoke Tilapia

20 May

Summer is all about brightness. Bright sunshine, bright colors, bright smiles… bright flavors! And is there any brighter flavor than lemon? I think not.

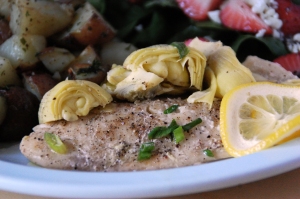
Recently, I made a chicken picatta recipe, which rocked. I mean, it blew my mind. So I thought, “hey, this lemon/artichoke thing has to work with other proteins, right?” And indeed it does! I’m still working out the possibilities, but the first match I’ve found is tilapia- a buttery, flaky fish that is gentle on the fishiness and heavy on the good stuff. If you’ve never had it- it’s time to try. Seriously, it’s wonderful. If you’ve had tilapia before- you’ll love this recipe. Guaranteed.

Baked Lemon & Artichoke Tilapia

Ingredients:

  • 2 filets tilapia
  • 1 lemon
  • 1 can artichoke hearts, drained
  • ½ tbsp olive oil
  • Salt
  • Pepper
  • 6 green onions, chopped

Directions:

  1. Preheat oven to 300 degrees (f).
  2. Lay tilapia side-by-side in an oven-safe dish.
  3. Drizzle with olive oil.
  4. Salt/pepper as desired.
  5. Cut artichoke hearts into manageable pieces, scatter over/around fish.
  6. Slice lemon thinly, scatter over/around fish.
  7. Baked for 18-20 minutes, or until fish flakes easily with a fork.
  8. Serve, and enjoy.

Do you have a favorite tilapia dish? Share it in the comments.

Download the .pdf version of this recipe: Baked Lemon & Artichoke Tilapia

Recipe: Black Bean Salsa

19 May

Ah, festive food. Food to watch a sports game on TV by. (Who am I kidding, I don’t watch sports.) Amendment: Food to watch Grey’s Anatomy by. (That’s more like it.)

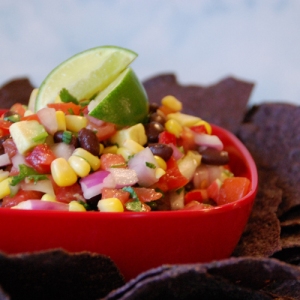
What, my friends, is more festive than a fresh salsa? I mean really. It looks like a party, and I’ll be darned if it doesn’t taste like a party.

You may not know this, but I worked at Chipotle for a time. Yes, it’s true- I rolled burritos with the best of them. (In fact, I could roll a perfect burrito behind my back at the height of my glory days- no joke.) I loved that job. There were several reasons for this.

  1. The restaurant was within walking distance of my dorm.
  2. I pretty much picked/chose my hours according to my schedule.
  3. My boss let me eat one free burrito a day- an allowance that quickly became my “bread and butter” when the university cut off my meal plan due to late payments on my tuition. (The job didn’t pay too terribly well, I’ll admit.)
  4. I learned how to make salsa. Kick-butt salsa. Bona-fide, make your mouth water salsa.

With my amazing knowledge gleaned from one of the best fast-casual restaurants on earth, (thanks, Steve Ells, for putting me through my sophomore year of college both financially and physically- I may have starved without those free burritos), I now give you all a gift: black bean salsa done right.

Black Bean Salsa

Ingredients:

  • 1 can black beans, rinsed/drained
  • ½ bag frozen corn, thawed
  • 2 large tomatoes, diced
  • 1 ripe avocado, diced
  • ½ large purple onion, diced
  • 1 fresno pepper, diced (tiny)
  • 1 serrano pepper, diced (tiny)
  • ¼ cup cilantro, minced
  • 2-3 tbsp kosher salt
  • 3-4 tbsp lemon juice

Directions:

  1. Combine all ingredients. Mix well. Allow juices to drain for 5-10 minutes.
  2. DEVOUR.

Do you have a favorite salsa recipe? Share it in the comments!

Download the .pdf of this recipe: Black Bean Salsa

Just the Basics with Jenna: Food Allergy Awareness Week

18 May

Last week, May 8-14, 2011 was Food Allergy Awareness Week. How many of you were aware of that? How many of us, when presented with the term “food allergy” even think of ourselves? While some food allergies are easy to diagnose and then eliminate from our diets, diagnosis is not always so easy. Most foods cause a much milder reaction and more and more people are entering adulthood without ever realizing their food allergies and sensitivities. I have a strong conviction that certain foods just should not be consumed by anyone, whether diagnosed with an allergy, or not. One of the main reasons that I became Paleo was because I wanted to improve my skin and eliminate stomach pain caused by food sensitivity. However, the reason I have remained Paleo is because of the research I have done regarding the post-agriculture foods that the human body consumes. Through this research, I have found that an allergen-free diet is not only for the food sensitive, but for any person with the desire to be stronger, healthier and ailment free.

I constantly come back to this thought: The most common food allergies in America are milk, wheat, soy and peanuts. The Paleolithic Diet restricts milk, wheat, soy and peanuts. Coincidence? I think not. Some people joke that the Paleo diet was just the effects of someone playing a cruel joke. “Let’s eliminate all the tasty foods and see who will last.” Instead, consider why four staple food items in the American diet happen to cause severe allergic reactions in millions of children and adults, and then ask yourself why you’re continuing to eat them. Sure, not everyone who smokes cigarettes ends up with lung cancer, but does that make cigarette smoke any less harmful? Do we not believe that cigarettes lead to lung cancer? While I know there are several people who can tolerate milk, wheat, soy and peanuts, exactly what does it mean to “tolerate” something? Does it just mean not feeling an immediate ramification? What if these foods were causing something to happen, below the surface? Perhaps an auto immune disease that doesn’t present itself until we are much older? I rarely preach The Paleo Diet, I am a strong believer in eating what you believe works for you. But that’s to the people who have tried to find out what works for them. There are still several people who have yet to even tune into their body, never mind listen to it. Though I’m a week late, it’s never too late to evaluate what you are eating, what your children are eating, and what that means in the long-term.

I’ll leave you with this note from the Food Allergy Anaphylaxis Network, “Between 1997 and 2002, peanut allergy in children doubled. The estimated number of Americans with food allergy has increased, and we don’t know why.” Maybe its only a matter of time before we’re all diagnosed…

Jenna comes to the Frugal Flambe with delicious allergen-free recipes for the busy family. A writer (see her blog: The Paleo Project) and experimental photographer, after several years of food sensitivity and skin problems, Jenna decided to begin a paleolithic lifestyle. Paleo eaters tend to stick to the pre-agriculture food groups: meat and fish, vegetables and fruits, healthy fats, nuts and herbs. No sugar, no dairy, no grains, no legumes, no peanuts, nothing processed. Just whole, organic, healthy foods that work well with the human body, eliminate auto-immune diseases and improve food related ailments. This allergen-free diet is Jenna’s new way of life and she is constantly teaching herself new ways to cook and feed her body what it needs.Every Wednesday, she’ll share her her dishes with families who suffer from allergies, or people who are looking to change their eating habits.  No sugar? No dairy? No grain? No problem!

Man Food with Mike: Mushroom Risotto

17 May

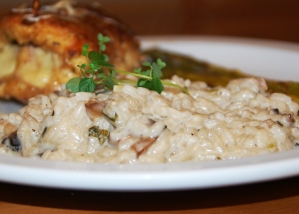
I can’t say I’m the most sophisticated foodie that ever walked the face of the earth. Most days if you place a piece of grilled meat in front of me I’ll say you just served me one of my favorite foods. However, last summer my wife and I ate a beautiful anniversary dinner at Crave restaurant in the Mall of America, and I ordered salmon, on top of the most glorious side dish I think I’d ever tasted: Mushroom Risotto. Having been a loyal Hell’s Kitchen junkie, I’d seen risotto come out of that kitchen many times, but I’d never actually eaten it before last summer. If you’ve never tasted a really good mushroom risotto before, my best description of it would be to take all of the joy and happiness of your favorite ice cream sundae, and put it into a rice dish. It’s wonderful. Although if you cook it correctly, it does require that you stir for almost 20 minutes straight, but I assure you it’s worth every bit of effort. I wish I could say this recipe was mine, but this one came from a chef who really knows how to create some amazing food: Emeril Lagasse. We like to make this dish with Chicken Saltimbocca because the flavors of both dishes compliment to each other. Enjoy!

Mushroom Risotto

Originally by Emeril Legasse

Ingredients:

  • 5 to 6 cups canned low-sodium chicken broth
  • 1 tablespoon olive oil
  • 2 tablespoons unsalted butter
  • 1/2 cup finely chopped shallots
  • 1 teaspoon minced garlic
  • 12 ounces assorted mushrooms, wiped clean and thinly sliced
  • 2 cups arborio rice
  • 1 teaspoon chopped fresh thyme
  • 1 cup dry white wine
  • 1/2 teaspoon salt
  • 1/2 teaspoon freshly ground black pepper
  • 1/2 cup heavy cream
  • 1 cup finely grated Parmesan
  • 2 teaspoons chopped fresh parsley leaves
  • 1 to 2 teaspoons truffle oil, optional
  • 4 ounces prosciutto, thinly sliced

Directions:

  1. In a medium saucepan, bring the stock to a simmer over medium heat. Reduce the heat to very low to keep hot.
  2. In a large heavy saucepan, heat the oil and melt the butter over medium-high heat. Add the shallots and garlic, and cook, stirring until fragrant and soft, about 3 minutes.
  3. Add the mushrooms and cook, stirring, until wilted and their liquid is evaporated, 4 to 5 minutes. Add the rice and cook, stirring constantly, until the grains are opaque, about 1 minute. Stir in the thyme.
  4. Add the wine and cook, stirring, until nearly all evaporated.
  5. Add 3/4 cup of the stock, the salt, and pepper. Cook, stirring constantly, until the stock is nearly all evaporated. Continue adding more stock 1/2 cup at a time as the previous addition is nearly absorbed, until the rice is tender and the risotto is creamy, 18 to 20 minutes.
  6. Stir in cream, 1/2 cup of the cheese, and the parsley and mix well. Remove from the heat and the seasoning, to taste.
  7. Serve immediately, topping each portion with a sprinkling of the remaining cheese and ham.

There’s all kinds of ways to make risotto, if you’ve got a link or favorite recipe for it we’d love for you to share it!

Download the .pdf of this recipe: Mushroom Risotto

Mike Guthrie is married to Shellina, and together they have completely changed their way of thinking when it comes to eating. Not only have they stopped eating out, but they also try to do so in fun, relatively healthy ways. The typical male, Mike loves meat; grilling it, basting it, frying it, and, of course, eating it. Every other Tuesday he’ll share a new “Man Recipe” (usually a general list of ingredients because, according to him, recipes are for chicks).